How to Cut an Uploaded Images in Different Colors in Cricut Design
Hello Daydreamers!
In today's tutorial, yous volition learn everything there's to know virtually color in Cricut Design Space.
How to add and change colors, fill images, and "Color Sync" are some of the things you will be learning today!
Most things I will teach you today tin can be done on the Cricut app. Although most screenshots are from a desktop, I volition also be including the screenshots that will show y'all where to find the tools to replicate all of the examples I have on this post.
Ideally, you will read this tutorial from the get-go because as nosotros become, we will exist implementing the concepts mentioned in the previews steps.
If at that place are some tools or concepts you don't understand, brand sure to bank check out myCricut Design Space tutorial for Desktop andmy Cricut App tutorial.
Are you lot ready?
Let'southward Daydream Into Reality!
How to Add Color in Cricut Design Space
To understand how to add Colour in Cricut Design Space, you also demand to know how colors are used with your machine.
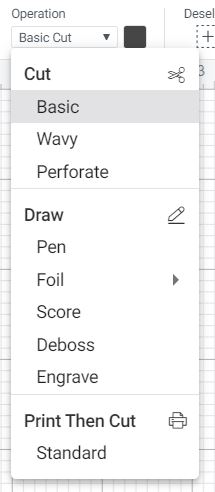
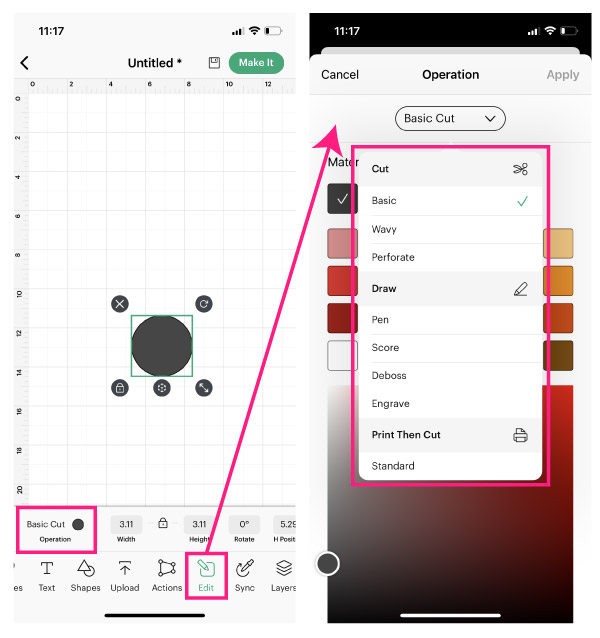
All of these settings work from the "Functioning" driblet-down menu located on the tiptop console of the canvas.
"Operation" is the way you tell your machine what action to perform; there are 3 different main operations (Cut, Draw, Impress then Cut), and some of them are divided into boosted options that translate into carve up tools you can install on your machine to perform an action.
- Cutting a fabric (Basic Cutting and Wavy Cutting)
- Cartoon on a cloth (Pen, Foil, Score, Deboss, Engrave)
- Print then Cut
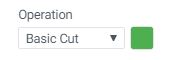
Next to "Operation," there's a little color box that allows you to modify colors in Blueprint Space. Some operations volition testify a filled colour box, others volition show a stroke, and other operations will not let you to change colors.
Depending on the machine y'all own, the operations you tin can perform with your device volition vary.
For this tutorial, I will show y'all all the operations from the Maker'southward point of view.
You tin skip over the things that don't apply to you.
SUPER Important: Nigh operations will require you to use the "Adhere" tool before sending a
project to the "Make it" interface. Attaching will tell your Cricut where to write, score, perforate, foil, etc.
Some operations, like "Basic Cut," "Wavy," and "Impress then Cut," stand for an entire material you're working with, like cardstock or iron-on. Other Operations like "Pen" and "Foil" represent a tool you will be installing on your automobile, and your device volition draw a visible pattern, and in that location are multiple colors you can choose from.
Final but non least, operations like "Perforate," "Score," "Deboss," and "Engrave." represent an action you want to perform on a material, and the tool itself doesn't add color to information technology.
Now, let'south have a lilliputian conversation for each one "Performance."
Alter/Add colors with "Basic Cut"
Every color represents a different material. Every color represents some other material when a layer has "Bones Cutting" every bit "Operation," every colour represents another material. These materials can be vinyl, newspaper, fabric, you name it.
Select "Basic Cut" when y'all simply desire your auto to perform a solid or straight cut on a material. Let's say you desire to cut a star, a carte du jour, a decal, etc.
Depending on the material you're using, basic cuts can be washed with dissimilar blades. For instance, you'll apply the fine point blade if you lot're cutting atomic number 26-on. If cutting craft cream, y'all'll need the deep point
blade. You'll apply the bonded material or rotary if you're cutting fabric. And if cutting basswood, you'll demand the knife bract.
Although you can select "Basic Cut" for any layer, you tin choose merely the tools your automobile is uniform
with on the "Make it" interface.
Tip: If you are working on a unmarried color pattern, you don't have to change colors because everything is 1 unmarried mat during the cutting process.
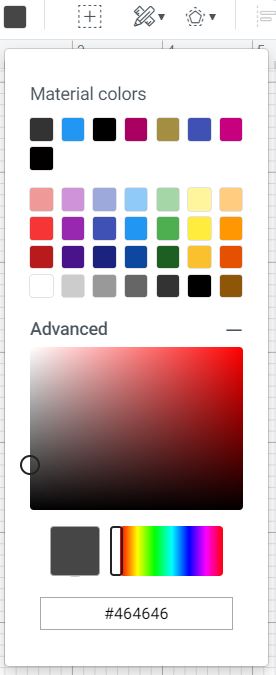
To change colors, add something to the canvas (image, text, shape), select it, and click on the petty foursquare next to "Operation" to pick your color.
There's besides an "Advanced" setting to permit you to see more colors and fifty-fifty find them by hex code.
Modify/Add colors with "Wavy"
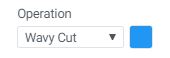
The Wavy cutting will crave a "Wavy Bract" if you have it along with a Maker automobile. This type of cut will create a decorative border on your designs.
You lot can also change the color of a Wavy cut because you're cutting a solid pattern, only with a pretty border. Information technology tin be fun to use on a card, scrapbooking, political party decor, etc.
Modify/Add colors with "Perforate"
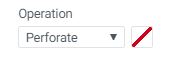
Perforate Cuts crave a "Perforation Blade." Select this option if you want to make tear-offs like the ones yous run across on raffle tickets, booklet pages, etc.
You can't change the color of a "Perforate" cutting because you need to tell your machine where and what you lot want to perforate; it's non like a "Basic cut."
Learn how to employ the perforation bract.
Change/Add colors with "Pen – Draw"
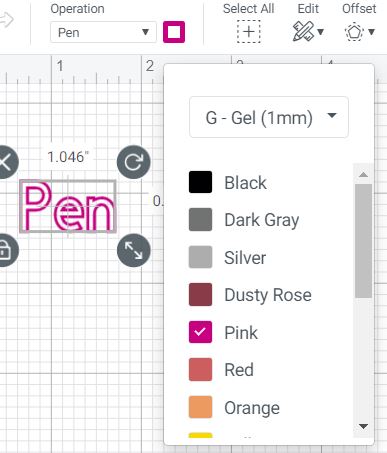
Select "Pen" if you lot want to describe on your projects with Cricut Pens. Pens won't color your designs; therefore, the color box won't testify a solid colour simply a modest stroke around it.
Important: When working with more than one color, it's ever a adept idea to select the blazon of pen and color you will be using.
Cricut uses random orders to draw, so you lot may use the wrong pen if you don't assign them correctly. Something cool is that yous can see the thickness of the pens when you employ different pen sizes.
To acquire all about the Cricut Pens, make sure to read my step-by-footstep guide.
Change/Add colors with "Foil – Describe"
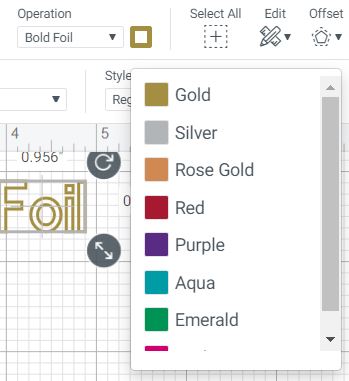
To add together foil effects to your projects, you demand the Foil Transfer Kit. The kit has three dissimilar tips (fine, medium, and bold) for large machines and but one tip for the Cricut Joy.
Once more, the foil kit won't foil the inside of your blueprint, it volition simply depict around it, and that's why the color box will bear witness a stroke rather than a solid color.
Circumspection: Cull the right tip for your projection because some materials have compatibility issues. Check out Cricut'south website to encounter what tips yous need for dissimilar materials.
Change/Add colors with "Score – Draw"
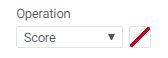
Scoring will let yous to add together folds to your projects. Scoring is
essential when making a menu, boxes, 3d projects, etc.
You lot can use two different tools for scoring: the scoring stylus and the scoring bike (tips 01 and 02). You can't change colors because the tool itself doesn't add any color but adds a scoring effect on a item material color.
Change/Add together colors with "Engrave – Draw"

This performance engraves a wide multifariousness of materials, and to utilize it; you demand the "engraving tip." It's perfect for personalizing domestic dog tags, jewelry, etc.
You lot tin't modify colors because the tool itself doesn't add any colour to your
textile.
Change/Add together colors with "Deboss – Draw"
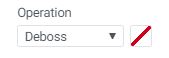
This functioning will push the material in, and information technology will create beautiful and detailed designs on paper, faux leather, etc.
To use it, you lot need the "debossing tip." You can't modify colors because the tool doesn't add together whatsoever color simply instead creates a debossing event on a particular material.
Modify/Add colors with "Impress then Cutting"
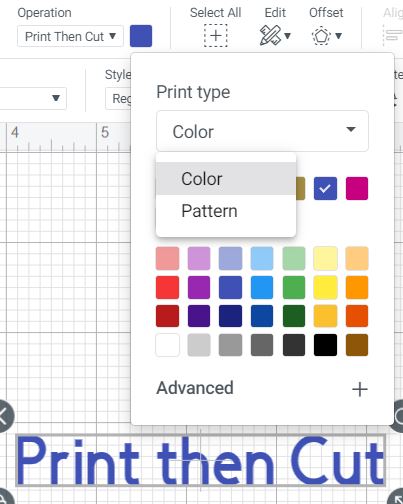
If y'all want to print a detail pattern and and so cut it with your auto, and so you would select "Print then Cut." With this operation, you tin can either use solid colors or patterns.
There are ii ways to tell your machine that something needs to be printed and so cut. The first is through "Operation," and the second is "Flatten."
Unlike any other "Operation," you lot canFill in images with the colors you lot want to utilize.
"Print so Cutting" is one of my favorite features the Cricut machine has. Some of the things you lot tin can make with this feature arestickers andgift tags.
When you use this characteristic, yous are putting your printer to piece of work, and your Cricut will cutting the edges of your design.
Previously I mentioned that irresolute colors wasn't e'er relevant because the final color is given past the material you lot use or the pen yous install in your machine.
Well!
That's not the case for print and then Cutting designs. Before you lot send your project to your printer, you need to make sure to add the colors the style you desire.
Something corking about "Print the Cutting" is that you tin can fill in (Color) your images with patterns. Cricut has hundreds of them!(Patterns are just available on Desktop computers, the app doesn't take them).
Print and then Cut is a very robust setting, and I can't encompass everything of it in this tutorial, and so bank check out my helpful guide.
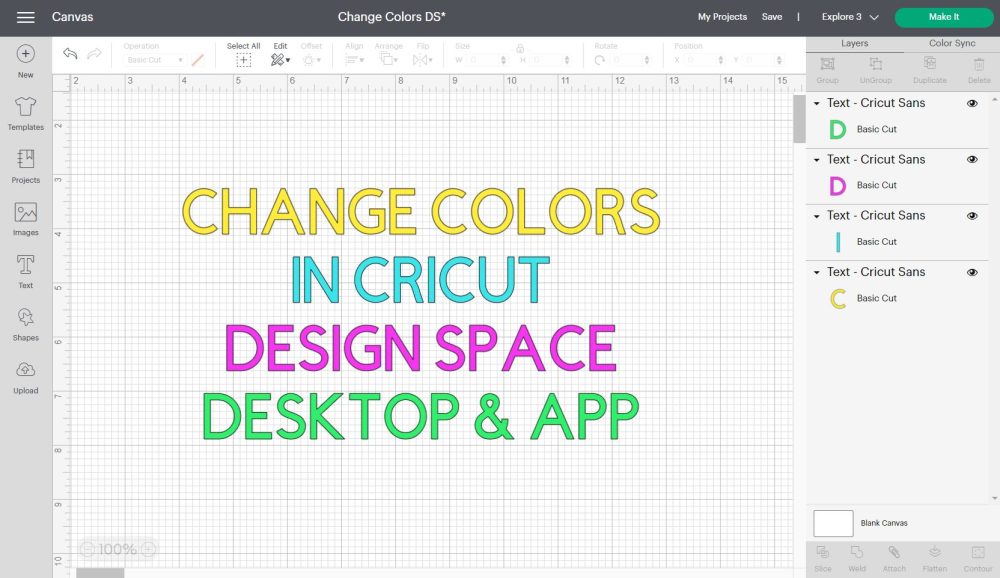
How exercise colors look like in Cricut Blueprint Space?
At this point, y'all know all the means to add or change colors in Cricut Design Space.
Here's a screenshot of how each option looks in the canvas area, then you have a ameliorate idea of how colors look when using different operations in Pattern Space.
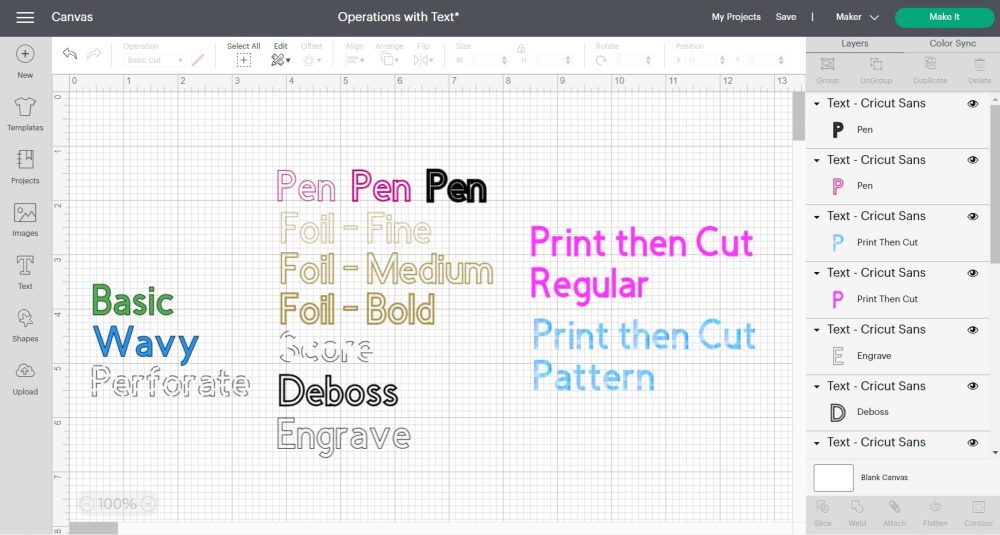
"Basic Cut" and "Wavy Cut" "mages have a thin grey outline (where the blade volition cut through) around the shape or design; think this colour represents the materials you are cutting.
"Perforate" "an be recognized when you see a dashed line.
Pen and foil draw layers are outlined. That outline represents the color of the pen or foil canvas you lot plan to apply for your project. The thickness of the outline will vary according to the type of pen (marker, calligraphy pen, etc.) or foil tip (fine, medium, assuming) you are using.
"Score" layers look dashed; however, the lines are a niggling bit larger when you compare them to "Perforate."
"Deboss" layers are represented with a solid bold outline, and "Engrave" layers are represented with a solid sparse outline.
"Print then Cut" "mages take no outline. The blade volition cut through the edges of your pattern.
How to Modify Colors of a Multi-Layer Pattern
When you download an SVG file from the net or add an paradigm from Cricut'due south library, y'all'll find that some designs have different colors.
Designs that have multiple colors are called multi-layer designs.
Usually, these images are organized and grouped when you add them to the canvas expanse; therefore, if you lot modify the colour correct away, all the layers will have the same color.
Larn more about Grouping in Pattern Space
To set this issue, select the multi-layer design and click on the ungroup option located on the top panel of the canvass area.
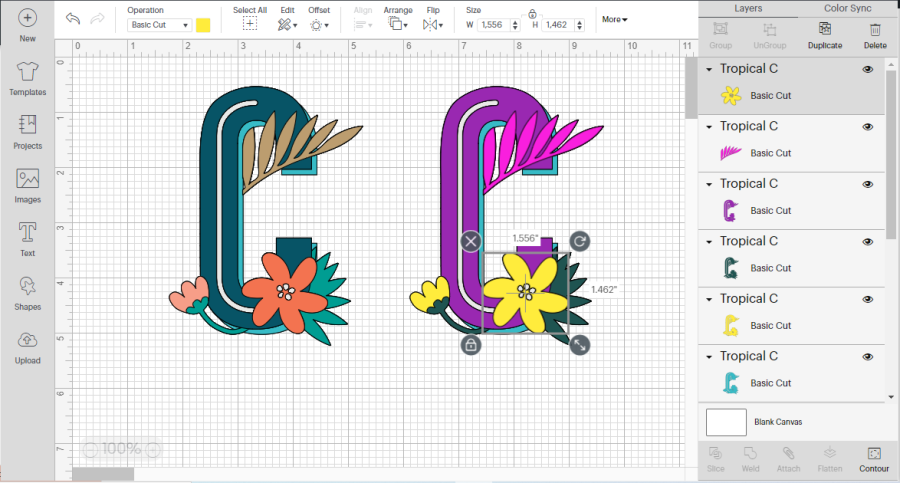
If images are on pinnacle of each other, like the screenshot correct higher up, you'll take a hard fourth dimension changing the colors of the layers at the bottom.
The best fashion to modify the colors of each element is from the layers panel. Select the layer you want to change and click on the color square next to "Operation."
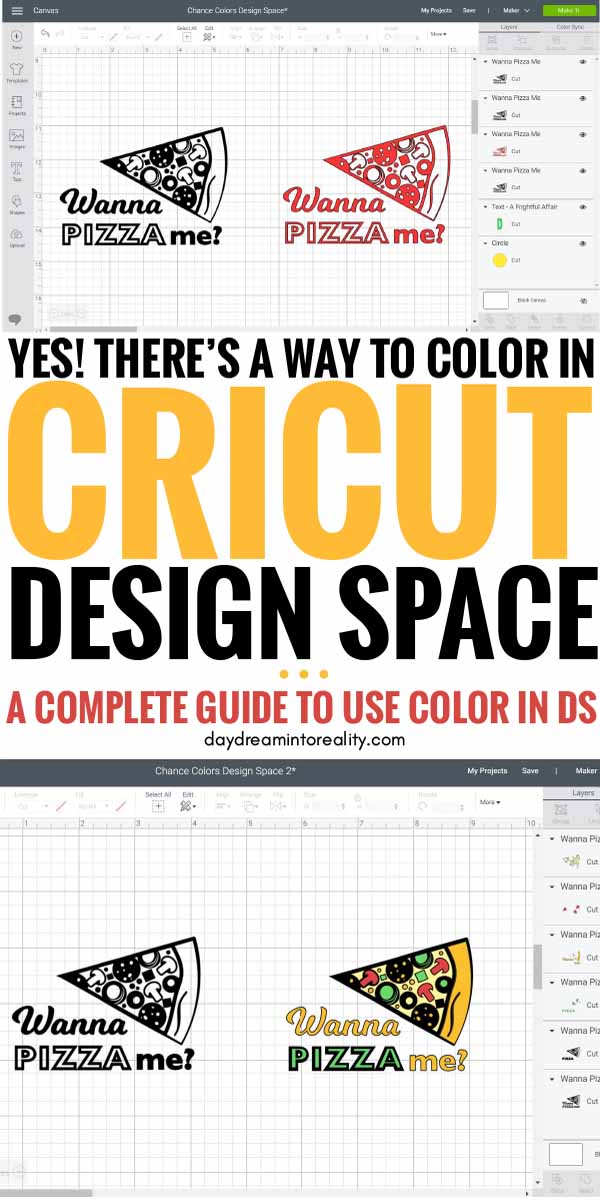
How to Color images in Cricut Design Space (Fill up in Images)
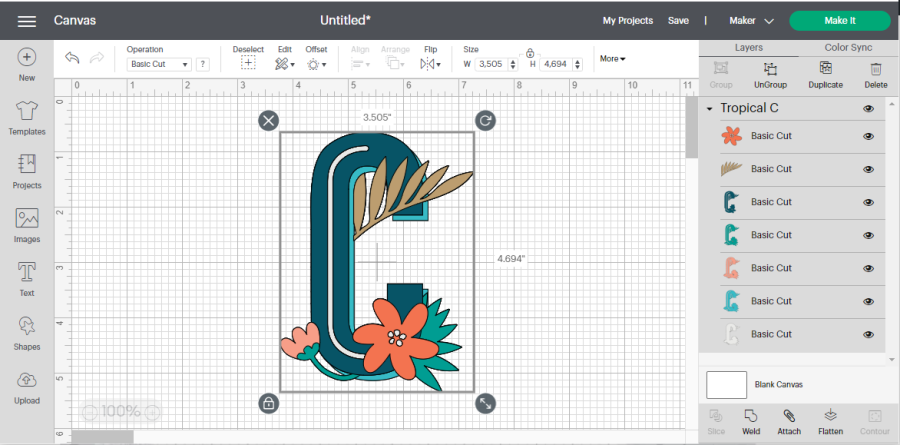
There'll be a moment in fourth dimension where you lot find an prototype that yous dearest a lot, but information technology's in a unmarried layer.
Annotation: If you desire to follow forth, the following epitome can be establish in CrCricut'sibrary by the code MB30A0C5.
Look at the screenshot down below.
When you change the colour of the pizza, all of the elements will change with information technology.
Also, if you look shut enough, you'll run across some blank spaces within the image; this is how the epitome was designed, and if you desire to have unlike colors, you demand to utilise the "Contour" tool.
This tool volition allow you to hide/testify unwanted pieces from your projects, and it's located at the bottom of the Layers panel.
With the "Contour" tool, yous can dispense an image to reveal something that wasn't there before, like the bare spaces in the pizza.
Don't forget that these colors will represent either a material, pen, foil color, or print. For case, if y'all were making a T-Shirt with vinyl later on doing what I am virtually to teach, you would need five different iron-on colors.
If you are new to "Contour" and are confused nigh using information technology, make sure to read my how-to guide.
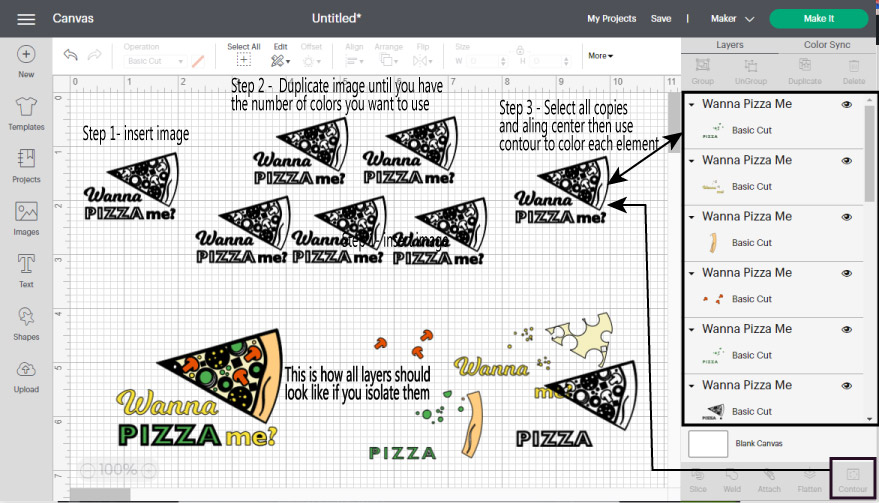
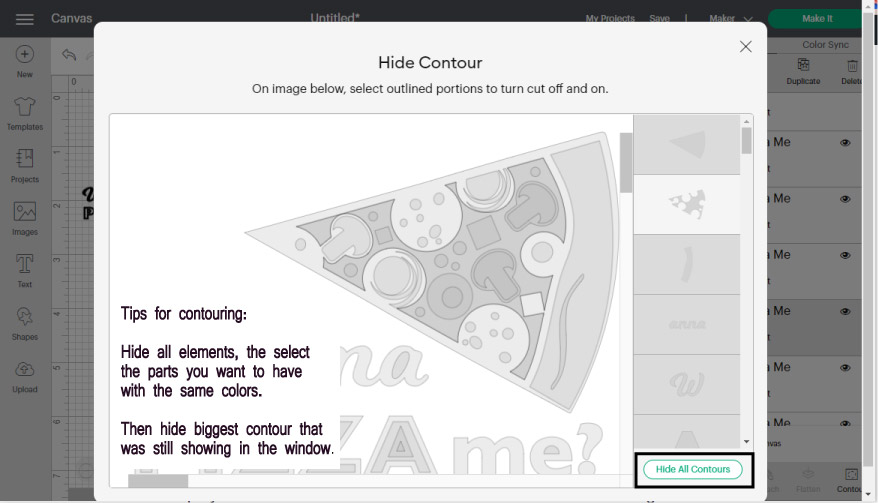
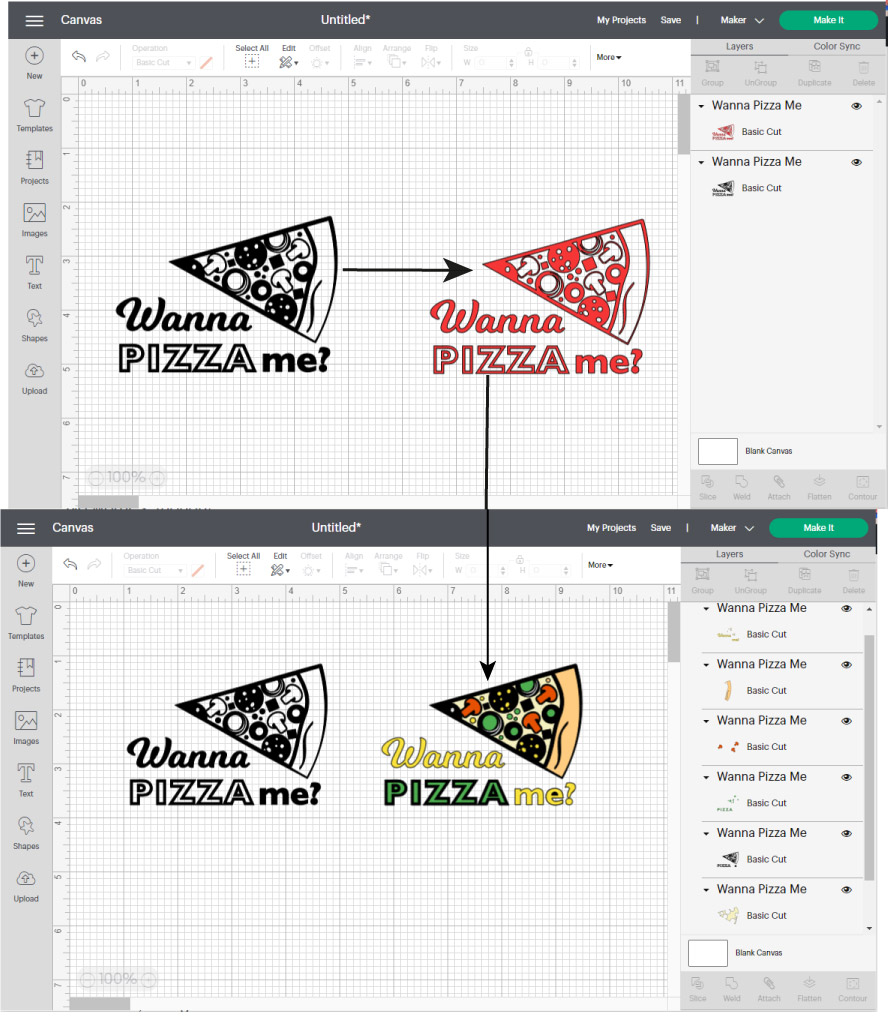
These are the steps you lot need to take to color inside the "Wanna Pizza Me" paradigm.
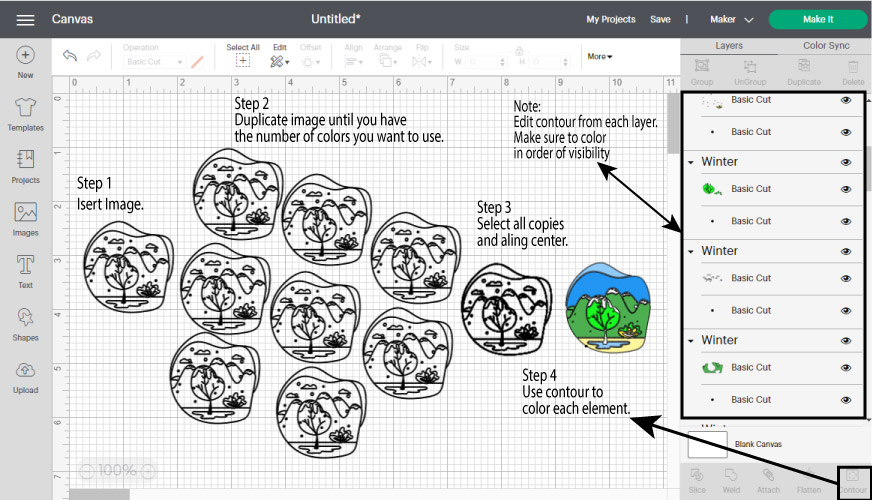
Step 1 – Insert Image
Add the image y'all want to color to Cricut Design Space. Ideal images for this technique accept blank spaces.
Step 2 – Make copies for each colour
Duplicate or copy/paste the paradigm until yous take the number of colors yous want to employ, plus some other copy of the original paradigm.
For this project, I used 4 different colors. Therefore I needed four identical copies.
Pace 3 – Heart images and use Contour
Select all copies and go to the top panel and click on Align and select the option, center.
With the contour tool, reveal the bare spaces and change the colors afterwards.
The best way to do this is by selecting each one of the images on the layers console, taking into consideration the size and order of the pieces you want to color.
Most times, the original image always needs to be the first, or lesser layer on the layers panel. The original image (pizza in black color) will be the outline or edge of your design.
This coloring is somewhat easy considering all layers (pizza condiments) respect their space. Still, at that place are times where i layer can exist covered past the other one.
Check out the following example to see this in action.
This image is a cute trivial landscape and can exist institute in Cricut's library with the code MD77B2E8.
I followed the steps I mentioned before up until pace 4.
When I used the contour tool, I decided to exercise some of the inside colors unbroken; this means that I didn't consider the snow dots in the mountains or the stars in the sky.
I usually recommend y'all take your time, but if your image is very intricate and you lot are using information technology for "Print so Cutting," you can focus on the guild of the layers instead.
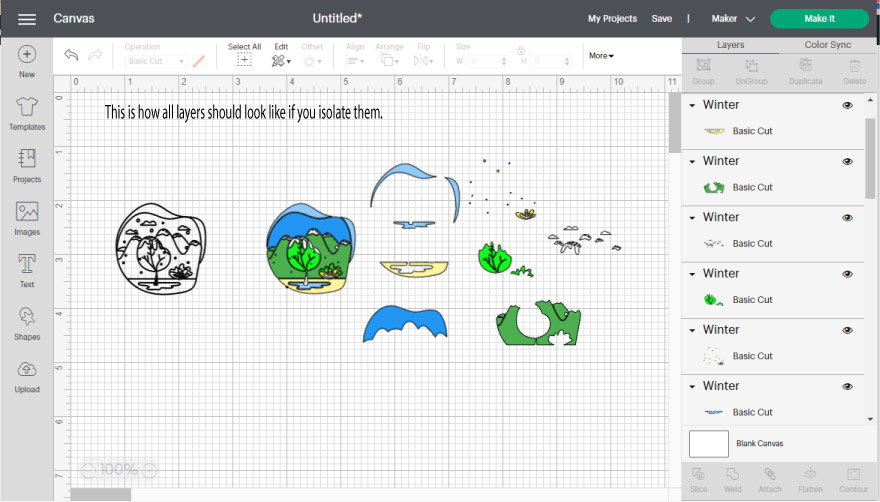
For instance, the mountains need to be underneath the snow (pocket-size black dots) in the layers panel; otherwise, the snow would disappear.
The order of the layers doesn't matter if you are cutting vinyl or other types of materials, butif you lot are using "Impress then Cutting" and "Flatten,"you lot need to brand sure all the layers are in the correct lodge.
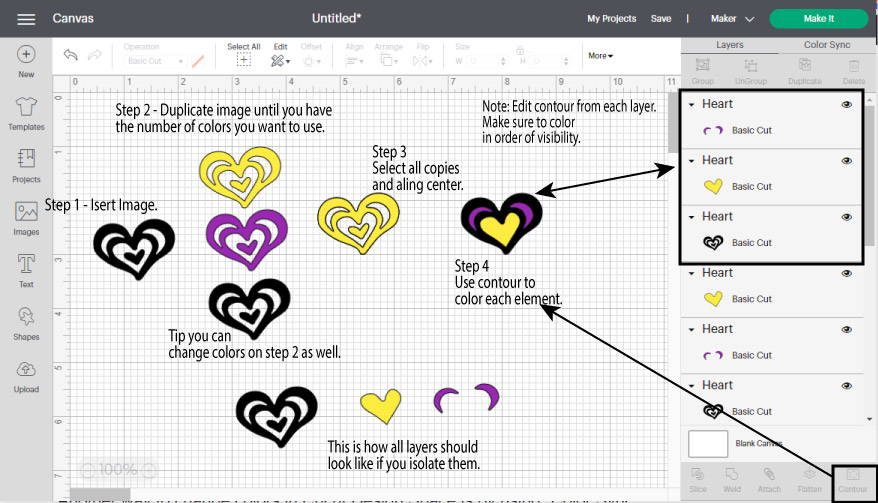
Hither's our third and last example!
I followed the aforementioned steps, merely this fourth dimension I decided to modify colors before I used the profile tool.
Every bit you can come across, there are many means you can practise something in Design Infinite. You get faster and effigy out better ways to accomplish the aforementioned task as yous practise.
DoDon'tver think for a moment that everything comes easy to me!
Sometimes I become into fights with my Cricut too, that's why I like taking my time putting in splendid content, and so no one else faces the same problems I practise.
What is Color Sync in Cricut Pattern Space
Another fashion to change colors in Cricut Design Infinite is by using "Colour Sync."
This fiddling feature doesn't get as much honey every bit other tools similar "Weld, Slice, Attach, etc." Merely let me tell you that you won't stop using it once you know why it'due south for you.
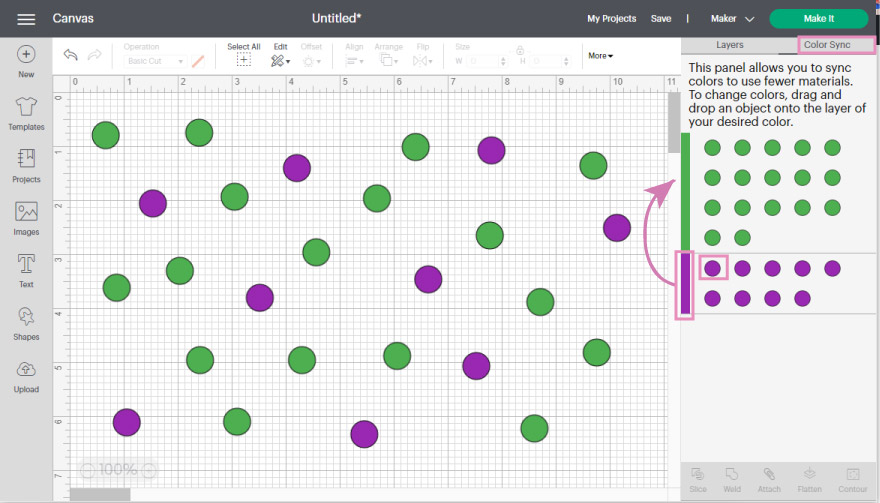
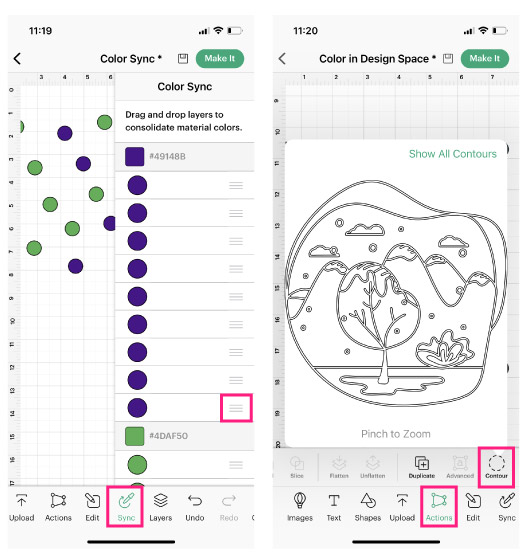
"Colour Sync" is located in the tab next to the layers console.
When you click on information technology, all the layers (images, text, shapes) that take the same color will be grouped.
In this example, you lot only see circles, only if you take text, y'all volition see a little initial of the word, and if you lot have an image, you will see a tiny icon that will correspond it likewise.
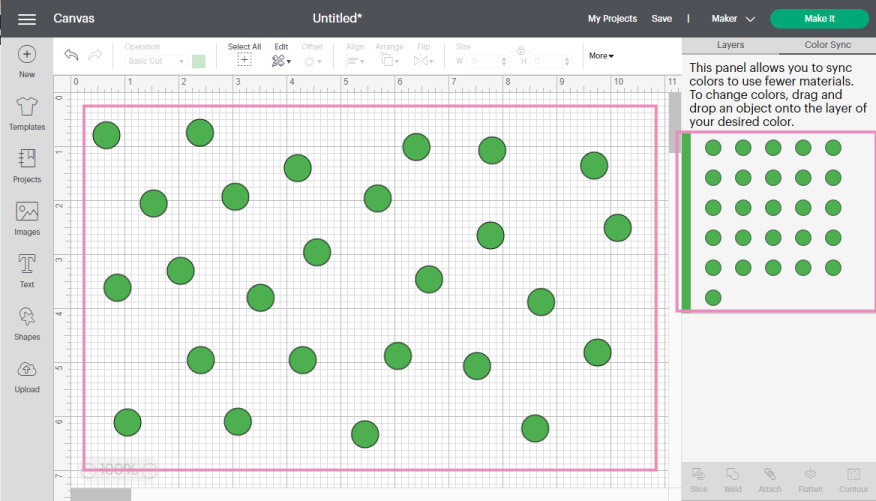
From the Color Sync panel, you can drag each layer to other colors, but what I like the most is that if you select the rectangle representing each color and drag it to some other color (dark-green in this case), all the colors will change instantly!
Isn't that astonishing?
The con with this technique is that if you have identical layers, you can't place them one by i. But, if y'all want to change colour in bulk, this tool will be your all-time friend.
What if the color yous want to add together or change it'due south not on the canvas?
Very uncomplicated.
Add an element, alter its colour for the ane you lot desire to use, and go back to Color Sync.
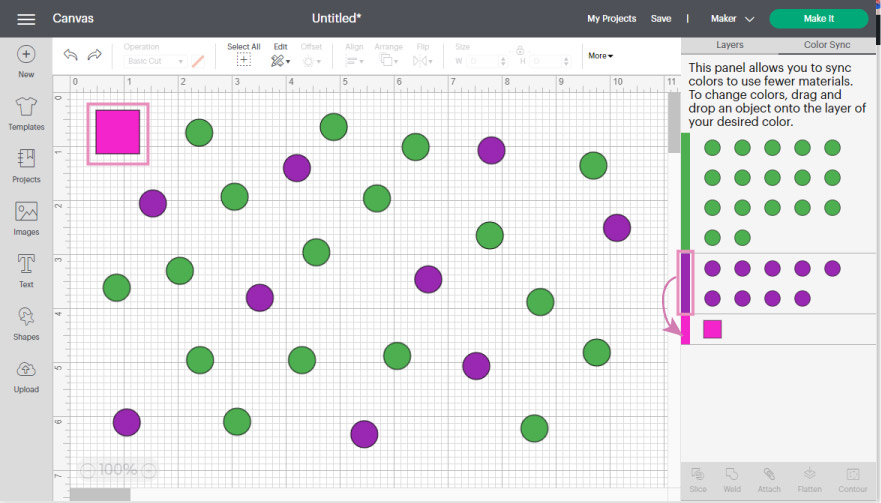
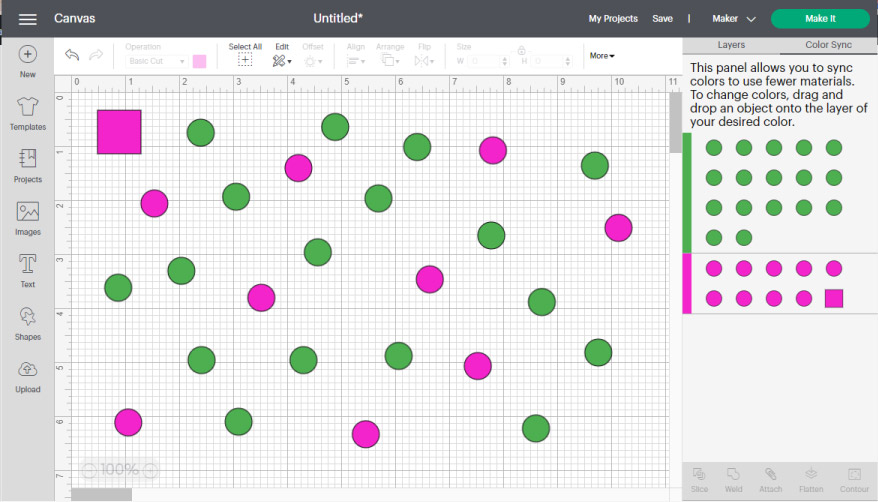
Now, select the colors you lot want to change and drag them to the new color.
It's like magic!
Don't you call up?
Changing Colors in Cricut Desing Space App
Nigh of the color tools and techniques I just explained throughout this tutorial tin be applied from your iPad/Phone.
There are only 2 things that the app doesn't support:
- Using Patterns for Impress then Cut
- Bulk editing colors with Color Sync. Information technology can only be washed with one layer at the fourth dimension.
If you have a phone, here are some graphics that will help you to find all of the things I just taught yous!
"Operation" is in the Edit menu (lesser console).
"Color Sync" is right by the "Edit" menu, and the "Contour" tool for coloring an paradigm in Pattern Space is located in the "Actions" menu.
I actually hope these screenshots help! I want to first considering app users more than oftentimes.
Do yous know that information technology takes me over 25 hours of work to consummate a single Cricut article? I know, it'due south crazy! But I like to make sure that y'all empathize EVERYTHING!
I would appreciate your support on Instagram / Pinterest / YouTube / as I am trying to abound my audition to keep producing great content!
Oh!
And simply so you know, I as well have a library full of free SVG files and Printables for all of my subscribers, a.thousand.a Daydreamers. You can run into a preview right here or get access by filling out this course.
Source: https://www.daydreamintoreality.com/color-cricut-design-space/
0 Response to "How to Cut an Uploaded Images in Different Colors in Cricut Design"
Post a Comment